Thursday, January 30, 2014

Crochet Mood Blanket 2014

Everybody's doing it!  This is definitely all the rage.  Stacey Wentford-Hall aka "Frofunky" on Instagram started this, having no idea what kind of response it would get.  Visit Stacey's blog for more information.

But here is the basic idea:  you crochet a block a day, or a block a week, based on your mood.  I've seen people take that idea and morph it into lots of different things.  People are making giant granny squares and all kinds of striped blankets - chevrons, granny stripes, mixed stripes.... lots of choices.

Having recently finished two big blankets, I decided to go small.  That's definitely a new concept for me. Besides, I have other plans in mind, and don't want to feel overwhelmed or burdened by this project.  I want to keep it fun.

So, this is what I have so far: mini-hexagons - using colors that reflect my mood at the time. I am using my existing stash of Stylecraft DK - and only working with what I have on hand.


My color choices and moods have been greatly influenced by the death of one of my dearest friends on December 3. She was diagnosed with advanced, metastatic colon cancer in August, and died peacefully at home just four months later.  Donna's favorite color was purple. Blue ribbons represent colon cancer awareness.  Right now, "feeling blue" is something I understand and experience often.  My hexagons mainly reflect my memories of Donna, missing her every day, and a visual representation of my grief. The shades of purple and blue vary in intensity based on which color speaks to me that day.

There are some colors with a different meaning. Red hexies are days that I was angry or frustrated.  Bright pink means I had a migraine.  (There are two of those in the top row, left).  And fiesta pink, which is actually brighter than "bright pink," reflects happiness and excitement (bottom right).

As I move through the year, I suspect some colors may change their meaning.  I'm okay with that.  I will be flexible and try to really let the colors speak for me.

This picture was taken just about 2 weeks before she died.  Donna received an award from our local Girl Scout Council.   At this point, she had been bedridden for months.  Hospice worked a miracle getting her into a wheelchair and escorting her to the award ceremony.  They were amazing!

Donna worked as Marketing Director for our Girl Scout Council many years ago, and that is where I first met her. We met again 7 years ago when we were both running local homeless shelters. She become one of my absolute dearest friends. She was an amazing woman, and the world is definitely a better place because she was here. I will miss her forever.

Donna Perras, 9/15/1954 - 12/3/2013


Final Update - Mixed Stripey Border

I worked hard to crochet my ends in during the project.  I still had a few to contend with at the end, but not too bad.  To me, weaving them in as I go is really essential. It's the worst part of the project - very tedious - and feels overwhelming if left to manage all at once.  But that's just me!

The border: 
2 rounds half double crochet - shrimp, 3 hdc worked in each corner stitch.
3 rounds hdc - aster

3 rounds granny stripe - wisteria, saffron, aspen.
*Work each corner like a regular granny square: 3 dc, 2 chain, 3 dc

Bobble stitch stripe - turquoise background and plum bobbles.

Final - Edie Eckman's Around the Corner Crochet Borders, #133 - fondant and lipstick.  I did a round of single crochet in fondant before beginning the special stitch.  Because of copyright, I can't give the directions, but border #133 is very simple - a series of chains looped and sc in place.  If you don't have this book, it's worth getting.  It has lots of great inspiration.

And that's it!

On Ravelry, there is a Crochet Along (CAL) that will be open at least this year - maybe longer - for people who are making their own version of the mixed stripe blanket.  If you've been thinking about making your own version of Little Woollie's awesome design, I encourage you to join the group.  I am one of the moderators, and know you will get lots of encouragement.  It's a nice group of hookers!  You can work at your own pace - share your progress - and get support and ideas from other people who are working on this project.  It's a lot of fun! 


Monday, January 27, 2014

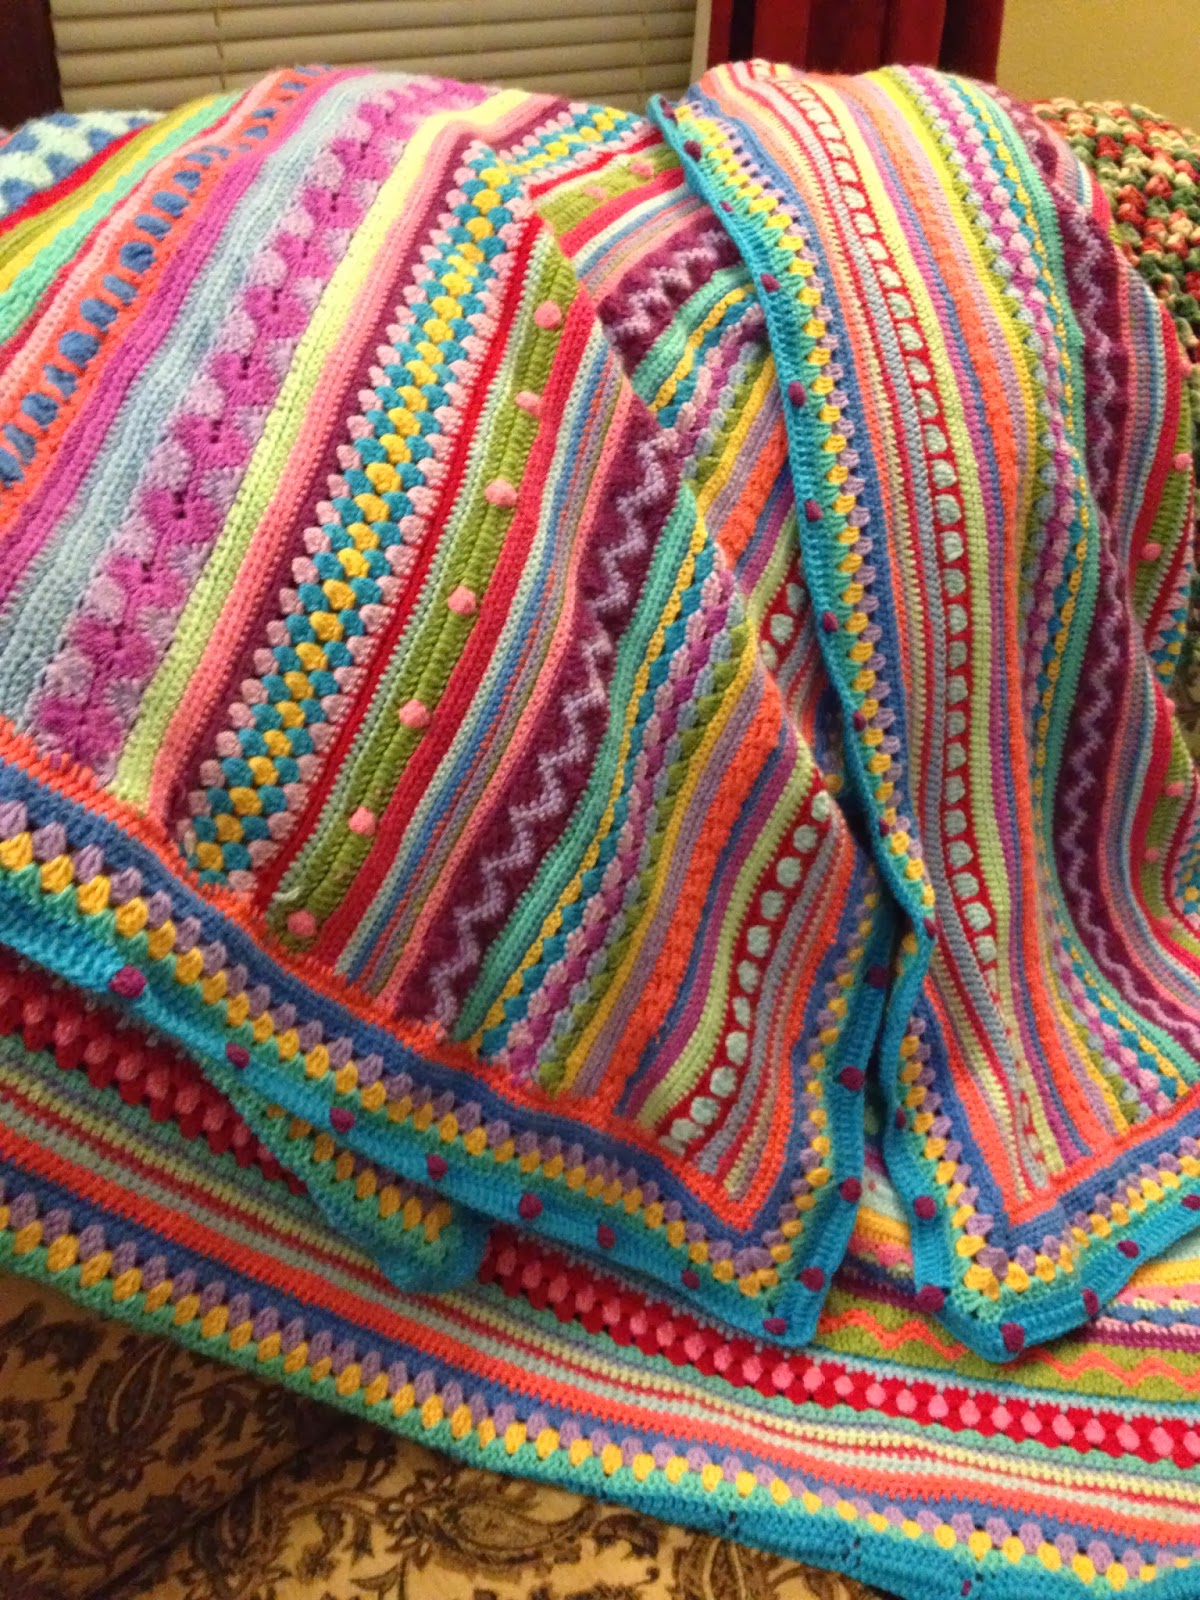
Big Happy Ta-Dah!

I thought I would never see this day, but here it is! Almost 1 1/2 years after beginning...it's finally done!

My posts with instructions/colors for each row are way behind - and as soon as this blanket comes out of the wash - I'll get that updated.  In the meantime - I think this is awesome eye candy!


Tuesday, January 14, 2014

Picture Updates!

Squares made by my daughter and students at Bowling Green State University. They yarn bombed the residence hall in December. Now those squares are being donated to Love-Squared.

More progress on circles! 

My daughter is a knitter!

Isn't this gorgeous?  She did a great job.

She is teaching me to knit.  Very challenging! (Ignore the dog hair!) 

Christmas stockings made by my Mom.  She has made 27 of these over the years - one for each of her children and grandchildren, and a few for nieces and nephews.  I can see how her skills have improved from the earlier stocking (made for me 48 years ago) when compared to the ones made for my girls.  They are all beautiful! 

Intricate patterns!  Lots of detail!


I'm still working on knitting.... switched to circular needle and find them much easier to use.  Shortly after taking this picture, I found a dropped stitch. Tried to repair it...ended up ripping out the whole thing and starting over.  Sigh. 

Thursday, January 2, 2014

Going In Circles

Using up odds and ends of brightly colored yarn.  Eventually, the circles will be made into squares.


Friday, December 27, 2013

Bobble Edge Tutorial

This make the cutest edging ever!  After completing a round of half double crochet for a base, I added the bobble edge.  If you are changing colors, slip stitch the new yarn in place.  The bobble is basically made by crocheting two clusters of DCs together into a little ball.  Each cluster makes half the bobble. Chains create the V shape.

Chain 5, then chain 3.  The 3 create the first DC in your cluster.
Cluster - chain 3 (already done) plus 3 DC together. This is basically doing the first part of a DC, and not finishing it, but going on and making all the first halves, until all your DCs are on the hook, waiting for the final half of the DC, which pulls them together into one cluster stitch.  (I hope that made sense!)

Anyway, here are instructions for the  DC together:  yarn over (yo), insert the hook back into the chain, yo, draw the yarn through the stitch, yo, draw the yarn through 2 loops on the hook.

Repeat the DC together stitch until you have 4 loops on your hook. Yo, pull through all the loops. Cluster completed!

Repeat the cluster - 3 DC, 3 DC together.  Now you have two clusters next to each other. Slip stitch into the top of the first cluster, pulling the two halves into a little ball.

Chain 5. Slip stitch into your project.  I like to make mine 4 stitches apart.

Repeat from the beginning - chain 5, chain 3, cluster, chain 3, cluster, slip stitch the clusters together, chain 5 slip stitch to the project.

I find this time consuming - but very gratifying! Hope the directions made sense to you, and you give it a try!


Ponchos are Cool!

I've been thinking about making ponchos for little girls for ages.  My Pinterest boards prove it - lots of pictures of cute little ponchos pinned - waiting and providing inspiration.  Took me a while to decide whether I'd go the stripe route, or with squares. I chose to make it from squares - but then how many?  Since I just finished the big blanket of little squares, I was ready to make a few large ones and be done.  These ponchos are made with just 4 squares each, plus borders.  I intentionally made each square different.  Pictures show both sides.  

About the edging...  when looking for inspiration, I saw a lot of fringe.  Fringe is good - but not the way I wanted to go.  I had visions of girls playing with it and accidentally pulling it apart.  Bobble edging seemed like the answer - and I LOVE the results!  

These are going to twin 5 year old girls.  I wanted similar but different.  One loves pink, the other loves purple, so there you go! 


Each square has 11 rounds of color... then one round of white.  I used a modified Join As You Go method to connect them.  Instead of connecting in each of the DC stitches, I simply used a slip stitch between each of the granny clusters.   I love the clean edge this gives.  

The neckline has one round of half double crochets to finish it off.  The bottom edge includes: one round of granny clusters in white, a round in the color, a round of half double crochet in color, and then the bobble stitch.  I will be posting instructions and pictures of the bobble edging soon.  It's definitely become one of my favorite ways to finish off a project and was quite simple.  Just chains and dc clusters. 


Saturday, December 21, 2013

Ta-Dah!


And it's finished!  I'm absolutely in love with the final results!  


Monday, December 16, 2013

Little Squares = a Big Blanket!

I'm surprised by the size of this blanket! I thought using up bits of yarn, it would end up being smaller, more like a throw instead of a full-fledged blanket.  Now, I don't think I'm capable of making them small!

Final count = 396 small squares - and more than 34 different shades of Stylecraft DK yarn.  Squares are arranged 18X22, with "planned" randomness.  I tried to make sure squares with the same outer color are not next to each other, and that the color distribution is balanced.  Otherwise, they aren't in any order. 

I decided the blanket needed a substantial border, with a little color to pull in the squares, and a really fun edge.  How about this? The bobbles are slow and time consuming - but I think they are totally worth it! Makes me happy to look at it!  I hope to finish this up and post final pictures in a few days.  

A few pattern notes:  this is a modified granny square using sets of 4 double crochet instead of 3. Corners have 2 chains. 

Bobble edge: chain 8, dc 3 together in the 5th chain, chain 4 dc 3 together in the 1st chain. This gives 2 halves of the bobble, which have to be connected with a slip stitch (or 2) by going back into the chain where you did the first dc3 together.  Chain 5, sc into your project to connect it.  Keep repeating.  I'll try to get pictures as I continue working and post them later.  Really simply - and super cute!


Wednesday, October 23, 2013

Love Squared and Progress on Random Projects

Time to update some of the projects I've been working on.  First - my friend Leah issued a 1,000 square summer challenge for Love-Squared.  It didn't take long to realize that we would smash that challenge, and in fact, we collected more than 2,000 squares by the end of September.  It was amazing!

Here are some of my contributions and some long awaited Ta-Dahs!

Lots of Hello Kitty squares - FINALLY completed!  
Miscellaneous granny squares, using up odds and ends of leftover yarn. 

And monster faces!  I think they ended up looking a little bit like Muppets. 


I finally finished my granny patch blanket... modeled by my sweet Gertie-bird!

Remember these?


My box slowly grew, until I had 396 little squares!  Now, it looks like this:


And I've connected less than half the squares!